Difference between revisions of "Using ChibiStudio"
Jithurbide (Talk | contribs) (→Configuring debuger) |
Jithurbide (Talk | contribs) (→Configuring debuger) |
||
| Line 218: | Line 218: | ||
Click apply and debug. | Click apply and debug. | ||
| + | |||
| + | |||
| + | If you have fellow this tutorial correctly, a error window need to appear telling you that ChibiStudio can't fing the bin file. | ||
| + | |||
| + | [[File:gdb-error.png|500px]] | ||
Revision as of 15:21, 19 June 2015
This documentation will cover the installation of ChibiStudio, ugfx and st-linkV2 for mikromedia STM32F4 board. But, if you use another board/programmer it's should be working with some modifications. For the moment, ChibiStudio is only available for Windows 32 bits. If you want to install it on Linux or OSX please refer to the official site of chibios.
Be careful, if you use Windows 64 bits, you need to install java in 32 bits or ChibiStudio will not start.
Contents
Installation/Configurtation
ST-LinkV2
First of all, you need to install the Windows drivers for the programmer.
Download the official STM32 ST-LINK utility form ST web site.
ST use a two page download step. After you have click on the link bellow, a new page is open. Go on the down the page and click on download.
Extract the archive and double click on the file STM32 ST-LINK Utility_v3.6.0.exe.
At the end of the installation, a wizard will ask you to install the drivers (may be the wizard will appear twice). Please install it or you won't be able to transfer a program on the board.
Reboot your computer. Try to connect to ST-LinkV2 programmer to your computer with the USB cable provided. Don't connect the programmer to the board. The new hardware info windows need to tell you the it's successfully installed.
ChibiStudio
Please download the last version of ChibiStudio with the link here : ChibiStudio
 For this documentation, we have use the version : ChibiStudio_Preview11.7z
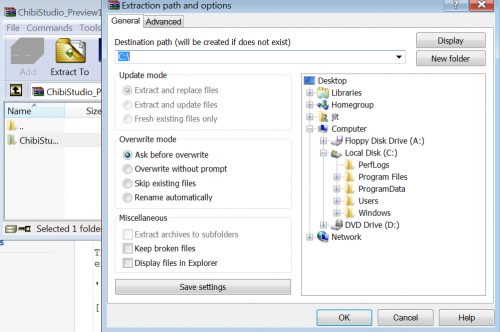
The package is a self-extracted folder that will contain all you need in one folder. Be careful, you need absolutely to extract the file into the root of you C drive.
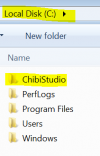
Then after the extraction you need to have a folder like :
c:\chibistudio
ugfx
For the installation of ugfx, please note that we strongly encourage you to use the git repository. If you have already git installed, download it like this :
- start a git command prompt
- c:
- cd chibistudio
- git clone https://bitbucket.org/Tectu/ugfx.git ugfx
But for this documentation, we will use this direct link.
Extract the content of the archive on the c:\chibbistudio.
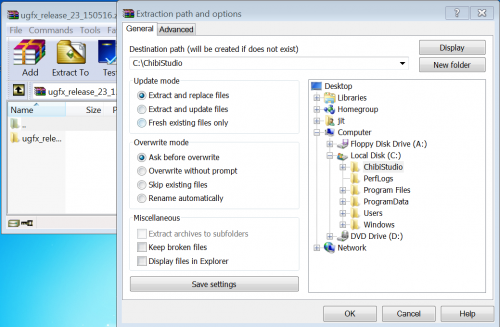 You need to extract the contain of the archive in chibistudio folder.
Then after the extraction, you need to have a folder like :
c:\chibistudio\ugfx_release_23_150516
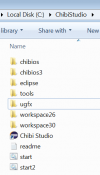
For best practice, and to be easier to remember, rename the folder ugfx. Then after the folder rename you should have :
Congratulation, you have finished the installation process. Now you need to do some customization because the board is not officially supported by chibios.
Configuration
First start of Chibistudio
It's now time to start ChibiStudio. You can find a shortcut in the c:\chibistudio.
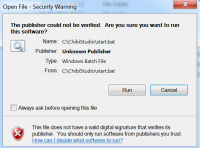
If you want, you can copy it to your desktop. Double click on the shortcut. A warning window will open.
Uncheck "Always ask before opening this file" and click the Run button.
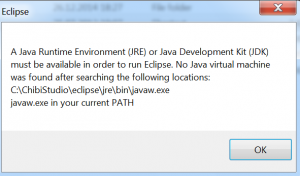
ChibiStudio needs java. If you don't installed it before or have Windows 64 bits with java 64 bits, you will see this warning :
Download java and install it.
You don't need to reboot your computer. After install it java, relaunch chibi studio shortcut.
create the first demo project
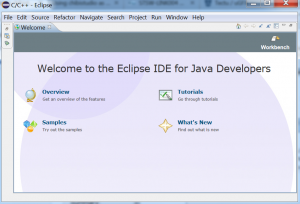
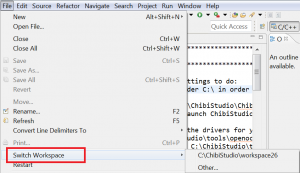
Close the welcome screen. ChibiStudio is provided with two workspace. One for the chibios 3 unstable and one for chibios 2. As the version 3 is not stable you need to switch to version 2. To do it, go the the file menu, switch workspace and select c:\chibistudio\workspace26.
To start a new project the faster way, you can copy one of the demo you will find in the project explorer. You can selection any project, but to be sure, please use STM32F4xx-GPT. Double click on it to open it. Then right click on the folder icon of this project and select copy. To copy it, right click on the icon and select past. A new window appear name the new project MikroMedia-base and click ok. Be careful, the name of the project need to not have space.
New we need to copy some files from the ugfx folder. Open Windows explorer and go to C:\ChibiStudio\ugfx\boards\base\Mikromedia-STM32-M4-ILI9341\example_chibios_2.x. You need to copy all files and folder form this to your new project.
Copy C:\ChibiStudio\ugfx\boards\base\Mikromedia-STM32-M4-ILI9341\example_chibios_2.x\*.* to C:\ChibiStudio\workspace26\MikroMedia-demo.
Replace all files. For this tutorial, you will use demo software of ugfx. All demo program has already a main function. To sucessfully compile, you must delete the main.c from the new project folder.
 Content of project folder after delete main.c
On ChibiStudio, open you new project and edit the Makefile. You need to change the path of chibios and ugfx like :
GFXLIB					= ../../uGFX
CHIBIOS				= ../../ChibiOS
That the end. You can try to compile a demo. This will compile the gdisp basics demo as the line says :
GFXDEMO = modules/gdisp/basics
If you want to try another demo, just change the line like (for running tetris)
GFXDEMO = applications/tetris
If you want to try tetris, you need to compile your program with math algorithm. Fopr this change on the Makefile the line :
LDFLAGS = -lm
To compile, click on the hammer icon.
If you have the error below, then you haven't save you Makefile. save it and try again.
If you want to try different demo, please do a clean (Project menu clean.. option) or your project will never compile.
Final configuration of your project
Before downloading the new software on the board, you need to do two action. First change the board folder to the correct one.
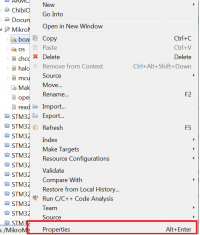
To do it, right click on the board folder in your project and select properties.
On the board properties window, click on edit next to Location field.
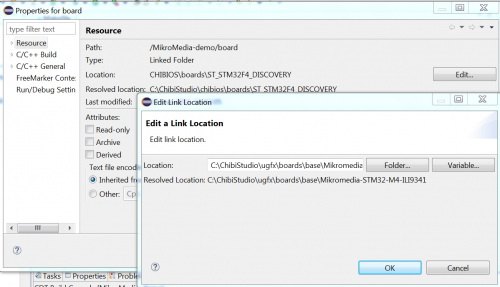 Select the path like : C:\ChibiStudio\ugfx\boards\base\Mikromedia-STM32-M4-ILI9341
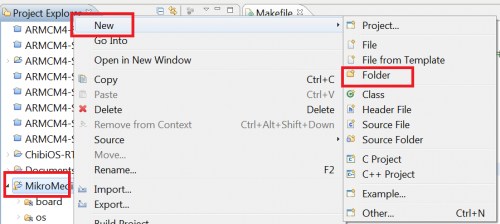
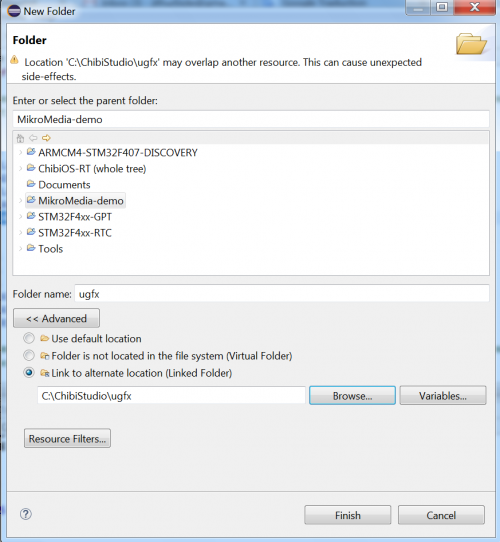
Secondly, you need to add ugfx folder to your project. To do it, right click on the project folder. On the sub-menu, select new and folder.
On the new folder window, click advanced option button. Select ugfx folder and click ok.
Configuration of OpenOCD
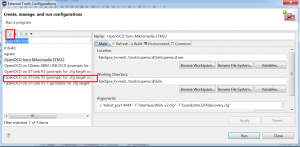
Open Openocd external configuration tools.
Copy the OpenOCD on ST-Link V2 (prompts for .cfg target configuration)
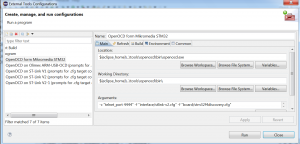
Change the name like : OpenOCD form Mikromedia STM32. Modifiy the argument option like : -c "telnet_port 4444" -f "interface/stlink-v2.cfg" -f "board/stm32f4discovery.cfg"
Click apply and close.
Connect the st-linkv2 to the board and the computer. run the last openocd config.
Configuring debuger
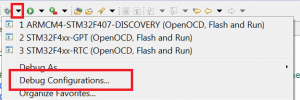
The last by not the least you need to configure your project with gdb. Start the debug configuration window.
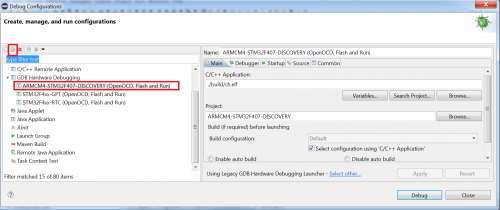
Copy a existing debug project.
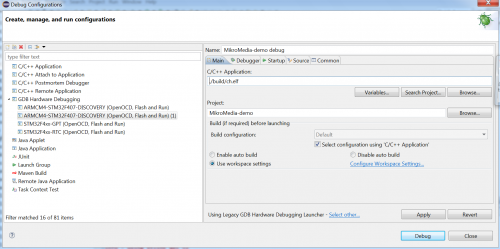
rename the project MikroMedia-demo and change the project to MikroMedia-demo.
Click apply and debug.
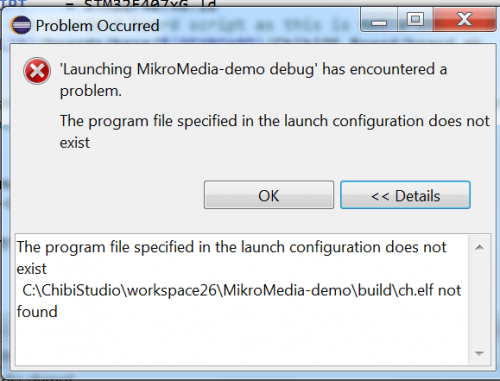
If you have fellow this tutorial correctly, a error window need to appear telling you that ChibiStudio can't fing the bin file.


