Difference between revisions of "Using PSoC Creator"
From uGFX Wiki
(→Adding µGFX) |
(→Adding µGFX) |
||
| Line 21: | Line 21: | ||
== Adding µGFX == | == Adding µGFX == | ||
This guide will describe how to add the µGFX library to a PSoC Creator project using the [[Getting_Started#Single_File_Inclusion|Single-File-Inclusion technique]]. | This guide will describe how to add the µGFX library to a PSoC Creator project using the [[Getting_Started#Single_File_Inclusion|Single-File-Inclusion technique]]. | ||
| + | |||
| + | The first step is to add the file <code>gfx_mk.c</code> which can be found in the <code>/src</code> directory of the µGFX library directory to the project. | ||
| + | |||
| + | |||
| + | Next, we need to add the top level uGFX library directory to the compiler include path. | ||
| + | [[File:psoc_build_settings.png]] | ||
| + | [[File:psoc_include_paths.png]] | ||
Revision as of 21:23, 17 August 2016
This article will explain how the µGFX library can be added to an existing PSoC Creator project.
Used Tools
The following tools were used to create this guide:
- PSoC Creator 3.3 CP3
- PSoC 5LP Prototyping Kit (CY8CKIT-059)
However, this article has been kept as generic as possible and should be usable for any PSoC platform.
Structure
We recommend using the following folder structure:
.
├── Project 1
├── Project 2
├── Project 3
└── ugfx
Adding µGFX
This guide will describe how to add the µGFX library to a PSoC Creator project using the Single-File-Inclusion technique.
The first step is to add the file gfx_mk.c which can be found in the /src directory of the µGFX library directory to the project.
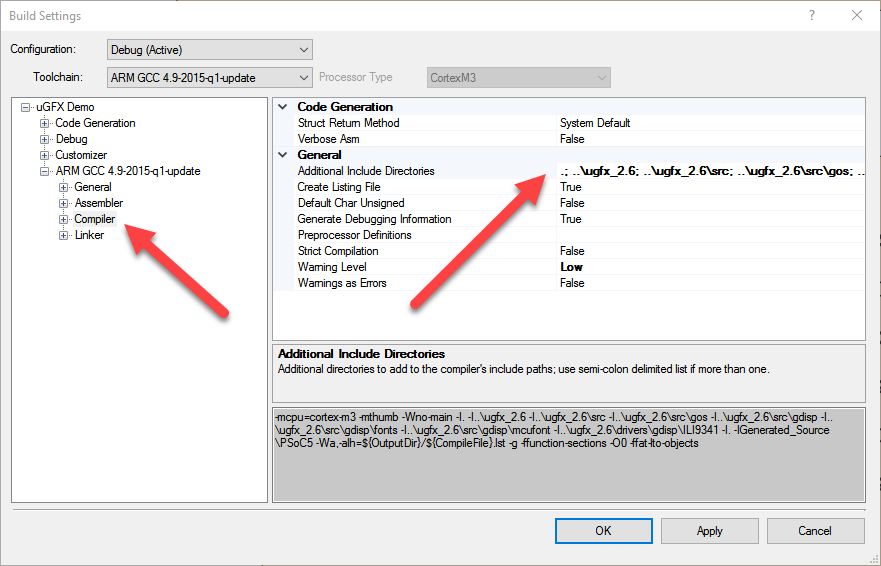
Next, we need to add the top level uGFX library directory to the compiler include path.
 File:Psoc include paths.png
