Using Eclipse
This article will explain how to setup a new project with the µGFX library or add the µGFX library to your existing project in Eclipse.
Contents
Preparation
First you will have to set up Eclipse to use your preferred tools and compiler. This can be done for any platform eg. Linux, Windows, ARM,... In this guide a project for a STM32Fxxx ARM µcontroller will be set up. To set up the necessary tools and compiler for ARM development in Eclipse the GNU ARM Eclipse website can be used. There is explained step by step how to install all nescessary components and configure Eclipse. It does not matter if you are using Windows, Linux, MacOS or any other operating system. As long as you can install eclipse and your preferred toolchain on it, this guide can be used.
For setting up the ST-Link V2 debugger on Windows check out the CibiStudio guide.
µGFX
You will also need a fresh copy of the µGFX library to start with. As described in the Getting Started guide, µGFX can either be downloaded as a stable release or you can get the latest version from the git repository. Please note that it's strongly recommended to use the git repository in order to get the latest bug fixes, features and improvements.
Creating a project
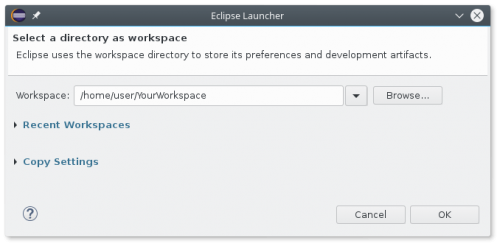
Now that al the required elements are installed, a new project can be made. When opening Eclipse a dialog will popup to choose where to locate the current workspace. A new one can be created by entering the path to the directory to store the workspace, or an existing workspace can be used. Note that one workspace can contain many projects.
When the new workspace has been setup, a new project can be made. Now there are two options to configure the project. The 'single file inclusion mechanism' can be used to include µGFX into your project, or a Makefile can be used. Both approaches will be discussed here.
Single file inclusion
The single file inclusion mechanism will include the µGFX library using a single c-file. This way the appropriate files are included and Eclipse will automatically generate the Makefile. The advantages and disadvantages of this approach are:
- File inclusions and generating the appropriate Makefile are managed by Eclipse.
- Easy to setup in a short time.
- All files will be copied into the project. Libraries can not easily be shared between projects.
- It's harder to keep libraries up-to-date.
- Easier to integrate into existing projects.
If you want to integrate the library in an exisiting project skip to Importing the µGFX library.
Making a new project
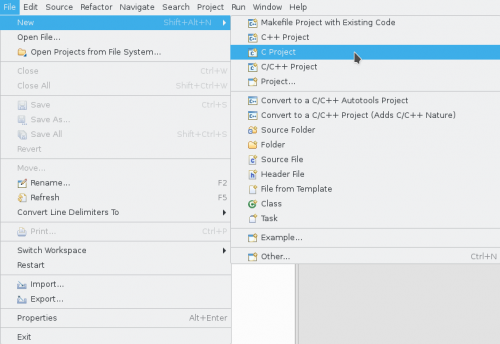
To start with this technique a new project has to be made. For most embedded applications a C-project is the appropriate choice. File -> New -> C-project Setting up a C/C++-project is exactly the same.
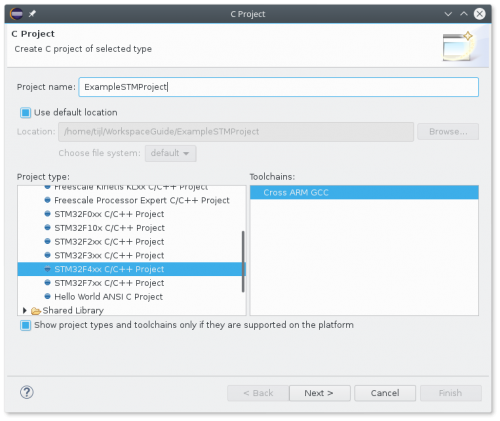
If the GNU ARM Eclipse setup went well, there should be a couple of example projects in the next screen. Selecting these projects will already include the appropriate CMSIS and HAL-libraries for your desired µcontroller series. It is also perfectly possible to make an empty project and to include everything yourself.
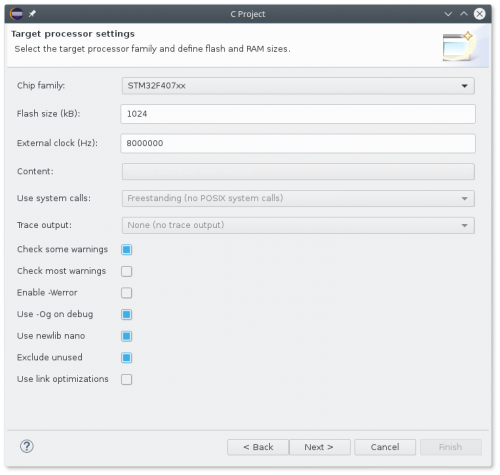
As an example a project for the STM32F4xx series µcontrollers is created. When clicking next, the chip family should be chosen and specified which external clock is fitted on the µcontroller board. It's important to choose the right value here, else the project will not run after uploading it to the MCU.
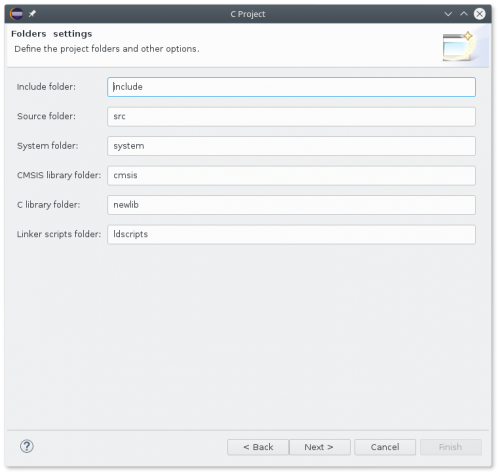
The other settings can be kept at default value. In the next step of the project creation, the folder names used in the project can be specified. It's up to the user to choose if anything should change here.
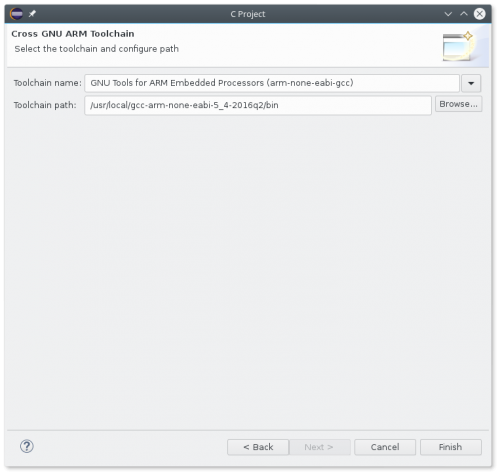
In the guide on GNU ARM Eclipse the GNU Tools for ARM Embedded Processors toolchain is installed. The installation directory of the toolchain must be specified so that Eclipse can use it to compile the project. The default location of the toolchain to be used can be set in Eclipse. The recommended way to this can also be found on the GNU ARM Eclipse website.
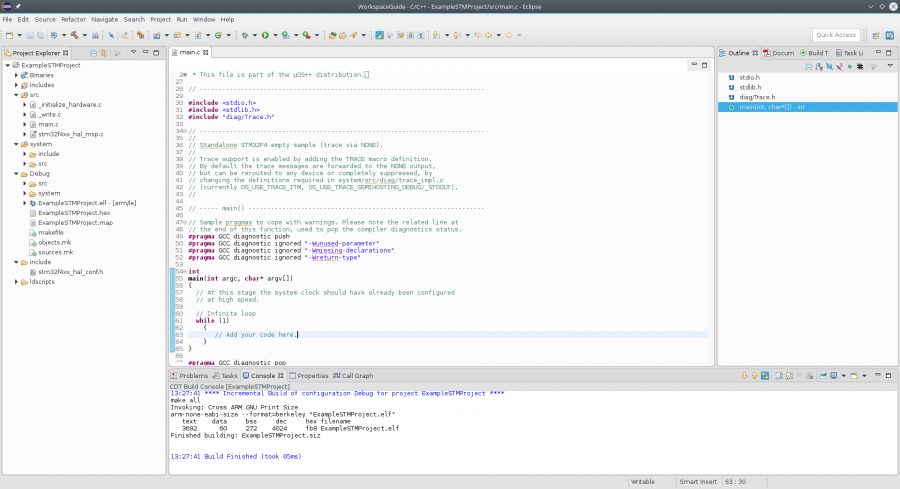
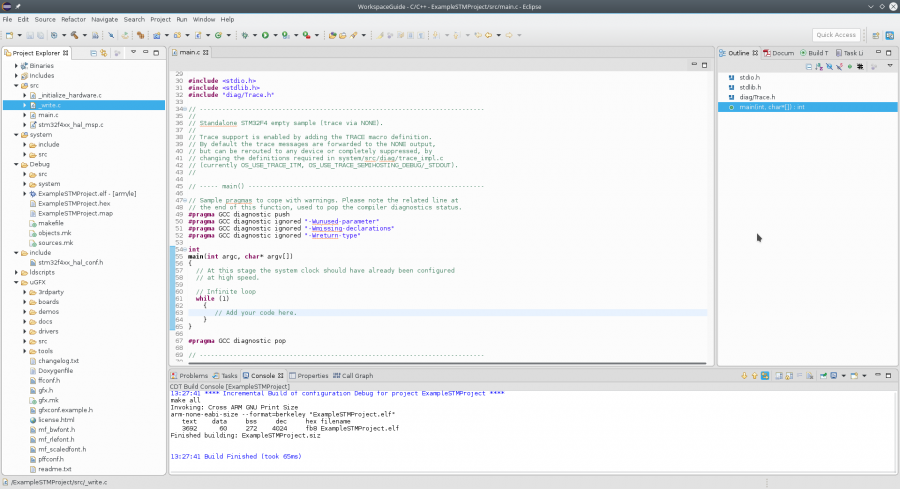
The project is now automatically generated by Eclipse with the correct file inclusions. Building the project should be successful. If not, make sure that the corrected toolchain is selected.
The project file tree can be seen on the left of the screen in the project explorer. The most important folders here are:
- src: All the user source files are placed here
- include: All the users header files are located here.
- system: Microcontroller specific libraries are located here, such as CMSIS, HAL-libraries,...
- Debug: Project outputs generated when compiling the debug configuration are put here.
- Release: Same as debug but for the release configuration.
Importing the µGFX library
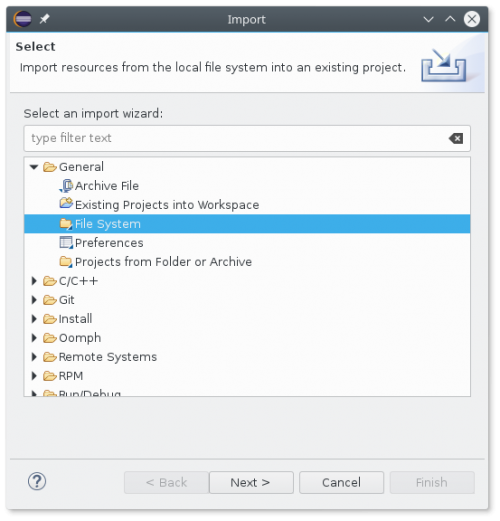
Now the µGFX library has to be added to the project. To do this go to File -> Import.
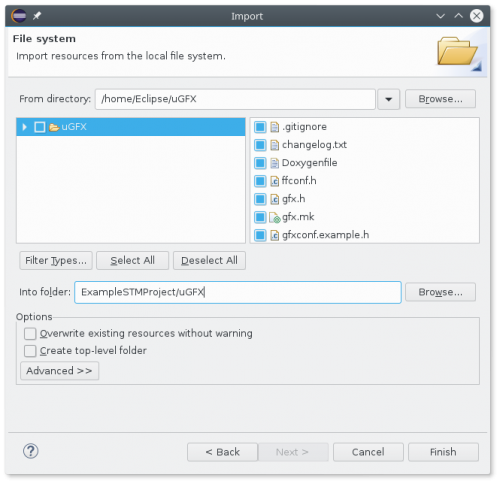
In the import screen, the option File system should be selected under General. Then click next. Now the location of your µGFX library should be specified. Eclipse will scan the whole folder and display the contents. Everything should be imported using the option Select All.
As a last step, the location to import the library into the project must be specified. This can be done by specifying the name of the project followed by the folder name to import the library into. Do not only specify the project name or all the files will be imported into the project root directory!!! The result of importing the library into the project is a new folder containing all the contents of the µGFX library.
Adding basic resources
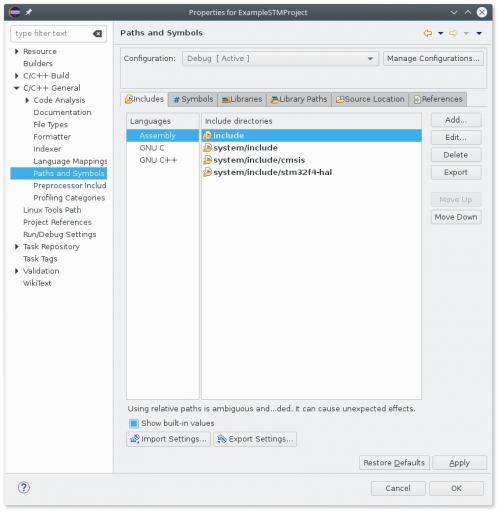
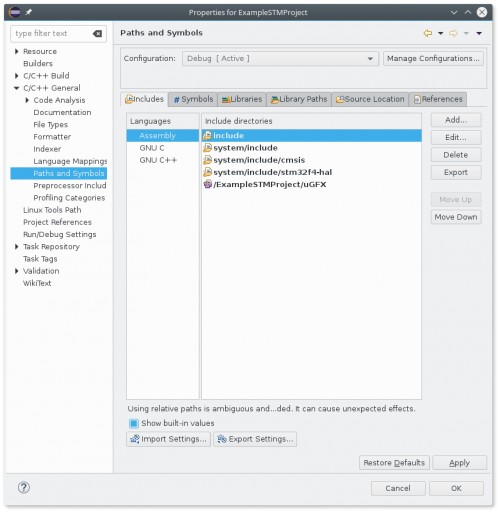
After importing the library into the project, the correct resources have to be added in the project options. This way Eclipse will automatically generate a makefile containing the µGFX library. To do this go to Project -> Properties. This will open a dialog with all the possible project settings. Here navigate to C/C++ General -> Paths and Symbols -> Includes tab.
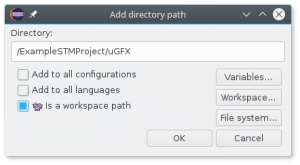
In the includes tab, are all the folders specified that are included when building the project. Here the whole µGFX folder that was just imported into the project must be added. Just simply click the Add... button and select the root folder of the library.
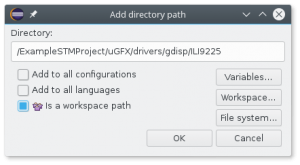
Eclipse will detect automatically that this is a path within the workspace.
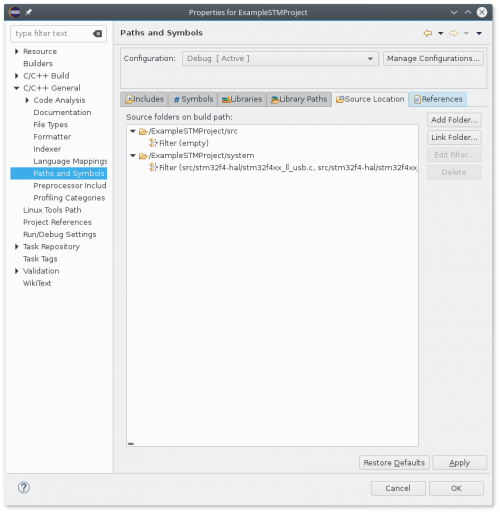
This is the result after including the library folder in the include directories. These steps must be repeated for all languages visible under the Languages pane. Note that when the project was started from scratch, you will have to specify the location of your include directory here as well as the location of the CMSIS and HAL-libaries. Now that the correct files are included, the correct sources have to be added to the project. For this again go to Project -> properties -> C/C++ General -> Paths and Symbols -> Source Location tab
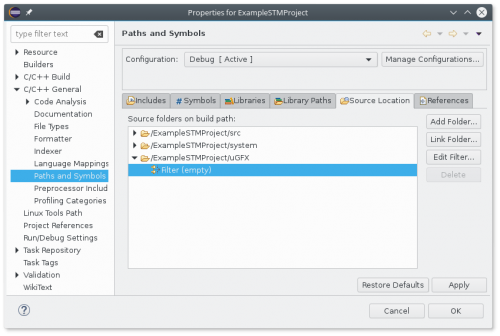
In this screen the src folder and the HAL-sources will already have been included in the build. Again if you started an empty project you will have to include all these sources yourself. Now with the button Add Folder... the µGFX library folder should be added to the list.
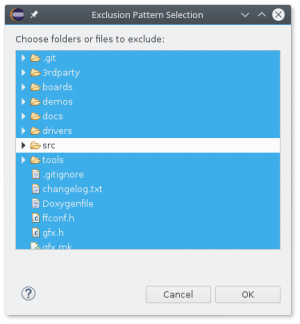
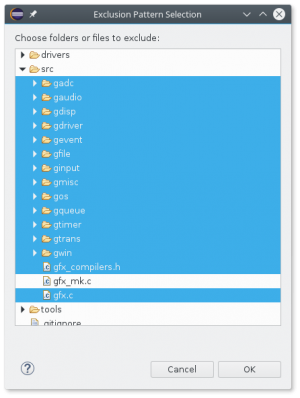
The result will be that all the files and folders in the uGFX directory are included in the project sources. This however will lead to alot of compilation errors. The only file that has to be included in the build is the gfx_mk.c. To do this, a filter will be added for the uGFX folder. (Note that this is also what is done for the system folder. Only the HAL-sources used are included in the build and all the others are excluded with a filter.) To edit the filter click on the button Edit Filter... when the uGFX folder is selected. To keep things simple, this will be done in two steps.
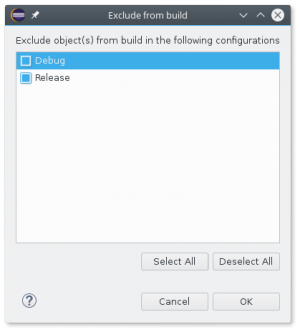
First select all the files and folders in the uGFX directory except for the src folder. Then click OK. Now choose Edit Filter... again and fold open the src directory. Select all files except the gfx_mk.c. When excluding these files Eclipse will ask from which configuration to exclude the files. Here just choose all available configuration.
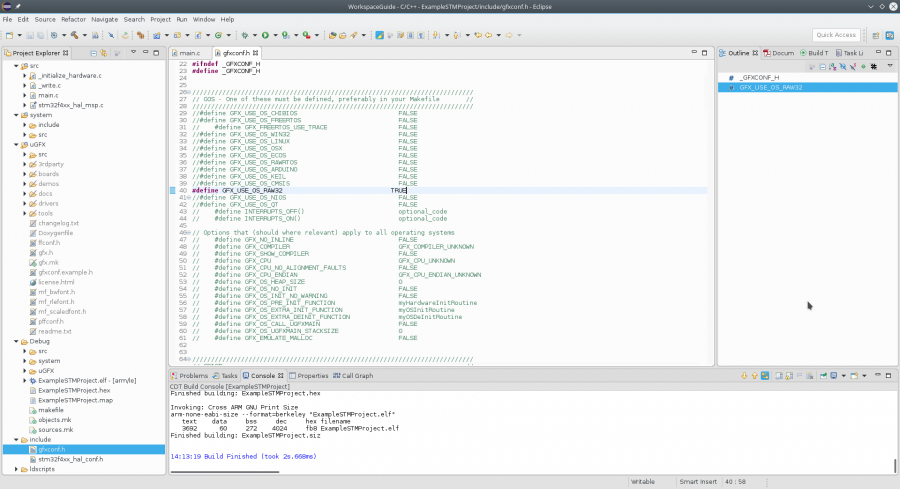
Now all the necessary files are included in the build using the gfx_mk.c file. The last step before being able to build for the first time is to configure the µGFX library. This is done by copying the gfxconf.example.h, found in the uGFX root folder into the include directory of the project. Rename it to gfxconf.h and set GFX_USE_OS_RAW32 to TRUE.
Note that to run use RAW32 as the OS two functions need to be implemented by the user in order for it to work. Chances are that for popular boards the RAW32 implementation is already present under boards/base. If not a very good example of what you need can be found under boards/base/STM32F439i-EVAL. The startup code found here was generated with STMCube. In this example the initialization is done with the functions found int the _initialize_hardware.c so there is no need for this code. In the example used here these functions are added by copying them into the file called stm32f4xx_raw32_ugfx.c in the src folder.
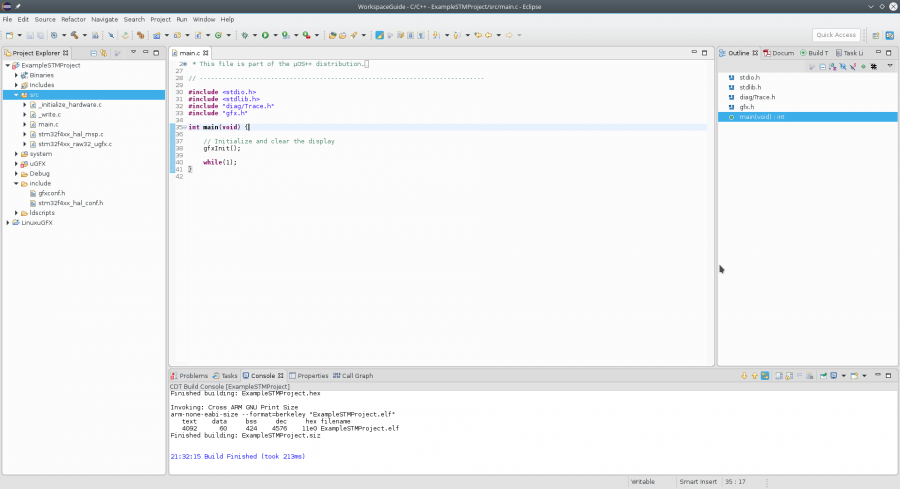
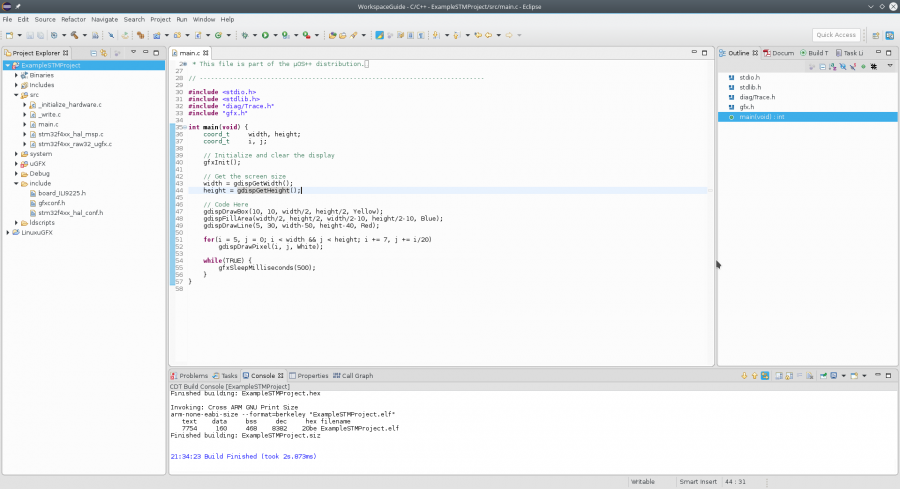
Add #include "gfx.h" to the main.c and everything should compile now like in the example above. However there is not much use for this project as there are no drivers included.
Adding driver resources
The basic configuration of the project is now complete. The only thing that is missing to use the library is a driver for the desired display, touch driver, audio driver,... All currently available drivers are found in src/drivers and all supported boards in boards/base. To include the necessary board files go to Includes tab in the project properties again. Here add the location of the required driver for your display, touch controller,... As an example a driver will be added to drive a display with the ILI9225 driver. The driver files for this driver are found in drivers/gdisp/ILI9225.
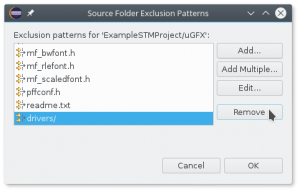
The gdisp_lld_ili9225.c has to be included into the build also. This can be done by going back to the Source Location Tab. Here the drivers folder entry must first be deleted. Else the whole folder will still be excluded even after setting individual rules to include the driver source file.
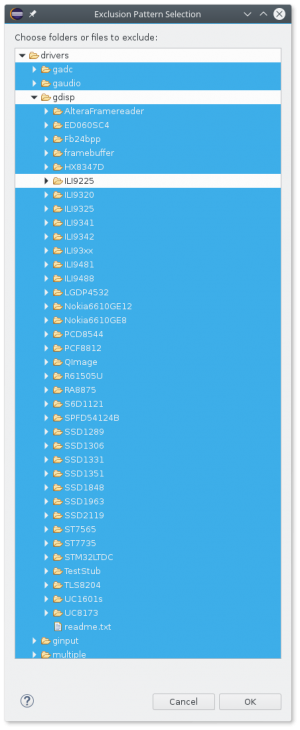
Now everything inside the drivers folder has to be excluded individually except for the folder containing the the driver that has to be included. This is the exact same procedure as for the gfx_mk.c.
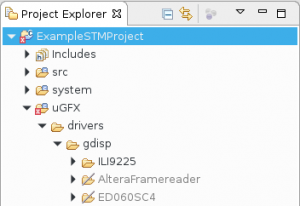
The result of including the driver folder can immediately be seen in the Project Explorer.
The last step to get the driver working is to add the board file. If your specific board is supported, the board file will be located at boards/base. Or an example for your board could be located at boards/addons. In the folder of your board, copy the board_driver.h file and paste it into the include folder of the project. Is your board not supported yet, copy a template board file to the include folder and edit it to make it work with your board. There are plenty of examples at boards/base. Also consider sharing it so other people can use it for their projects! Now in the gfxconf.h file enable the corresponding GFX module to start using the driver. In this case the #GFX_USE_GDISP has to be set TRUE along with the desired drawing functions to use the display.
The project is now complete and should compile without errors. Is this guide incomplete or do you have trouble setting everything up correctly just leave a message on the support forums for help!
Makefile approach
The second way to setup a project with µGFX in Eclipse, is the Makefile approach. This approach also has it's advantages and disadvantages:
- Libraries are included via relative paths and thus shared between projects.
- Requires a bit more work to set up and understand.
- Once set up easy to maintain and add resources.
- Projects are easily ported to other systems/platforms.
Making a new project
This section is still work in progress. However, the guide for the ChibiStudio already explains the basics for this method.
